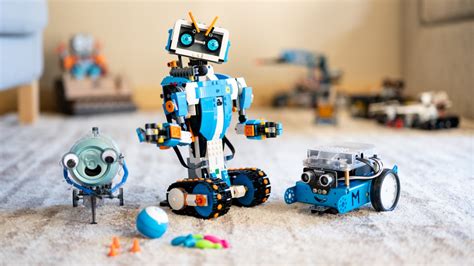
Are you frustrated with your Lego robot that's not functioning as it should? Whether it's a simple model or a complex creation, a malfunctioning Lego robot can be a disappointing experience, especially for kids and adults alike who are enthusiastic about building and creating with these iconic interlocking bricks. The good news is that many common issues with Lego robots can be easily fixed with a few troubleshooting steps and some basic knowledge of Lego robotics. In this article, we'll explore five ways to fix your Lego robot today, covering topics from diagnosing the problem to replacing faulty components.
Lego robots are an excellent way to introduce kids and adults to the world of robotics and programming, teaching valuable skills such as problem-solving, critical thinking, and creativity. However, like any electronic device, they can sometimes malfunction or break, requiring repair or troubleshooting. Before we dive into the troubleshooting steps, it's essential to understand the basics of Lego robotics and how they work.
Understanding Lego Robotics
Lego robotics is a subcategory of Lego products that focuses on creating robots using Lego bricks, motors, sensors, and other components. The most popular Lego robotics kit is the Lego Mindstorms series, which allows users to build and program their robots using a visual programming language. Lego robotics kits usually include a combination of the following components:
- Lego bricks and plates
- Motors and actuators
- Sensors (e.g., touch, light, and ultrasonic)
- A microcontroller or "brain" unit
- A programming software or app
5 Ways to Fix Your Lego Robot Today
1. Diagnose the Problem
Before you start fixing your Lego robot, it's crucial to diagnose the problem. Try to identify the symptoms of the issue, such as:
- The robot is not moving or responding to inputs
- The motors are not working or are making unusual noises
- The sensors are not detecting objects or changes in the environment
- The robot is not following the programmed instructions
To diagnose the problem, follow these steps:
- Check the power source: Ensure that the batteries are properly inserted, and the power switch is turned on.
- Inspect the cables and connections: Verify that all cables and connections are secure and not damaged.
- Consult the user manual: Refer to the Lego robotics kit manual or online documentation to troubleshoot common issues.
2. Check and Replace Faulty Sensors
Sensors play a critical role in Lego robotics, allowing the robot to interact with its environment and respond to changes. If your Lego robot is not detecting objects or changes, it may be due to a faulty sensor. Here's how to check and replace sensors:
- Touch sensors: Check if the touch sensor is properly connected to the microcontroller. If it's damaged, replace it with a new one.
- Light sensors: Verify that the light sensor is clean and free from debris. If it's damaged, replace it with a new one.
- Ultrasonic sensors: Check if the ultrasonic sensor is properly connected to the microcontroller. If it's damaged, replace it with a new one.
3. Fix Motor Issues
Motors are essential components of Lego robots, enabling them to move and perform actions. If your Lego robot's motors are not working or are making unusual noises, follow these steps:
- Check motor connections: Verify that the motor cables are securely connected to the microcontroller.
- Inspect motor gears: Check if the motor gears are damaged or worn out. If so, replace them with new ones.
- Replace faulty motors: If the motor is damaged beyond repair, replace it with a new one.
4. Troubleshoot Programming Issues
If your Lego robot is not following the programmed instructions, it may be due to a programming issue. Here's how to troubleshoot programming issues:
- Check the programming software: Verify that the programming software or app is updated and functioning correctly.
- Inspect the program code: Review the program code to ensure that it's correct and free from errors.
- Test the program: Run the program in a simulated environment to test its functionality.
5. Replace the Microcontroller or Brain Unit
In some cases, the issue may be with the microcontroller or brain unit of your Lego robot. If you've tried all the above steps and the problem persists, it may be necessary to replace the microcontroller or brain unit. Here's how:
- Check the compatibility: Verify that the replacement microcontroller or brain unit is compatible with your Lego robotics kit.
- Follow the replacement instructions: Refer to the Lego robotics kit manual or online documentation for instructions on replacing the microcontroller or brain unit.

Gallery of Lego Robot Repair


Frequently Asked Questions
What are the most common issues with Lego robots?
+The most common issues with Lego robots include motor problems, sensor issues, programming errors, and power source problems.
How do I troubleshoot my Lego robot?
+To troubleshoot your Lego robot, follow the steps outlined in this article, including diagnosing the problem, checking and replacing faulty sensors, fixing motor issues, troubleshooting programming issues, and replacing the microcontroller or brain unit if necessary.
Can I replace the microcontroller or brain unit of my Lego robot?
+Yes, you can replace the microcontroller or brain unit of your Lego robot if it's damaged or faulty. However, ensure that the replacement unit is compatible with your Lego robotics kit and follow the replacement instructions carefully.
By following these five ways to fix your Lego robot, you should be able to diagnose and repair common issues with your Lego robotics kit. Remember to always refer to the user manual and online documentation for specific instructions and troubleshooting guides. Happy building and repairing!
